


Materials
needed:

You are going to be using all 3mm wide and 10 cm long multicolored quilling paper strips.
The basic quilled shape that you are going to use is a loose circle. You will then be shaping each loose circle according to need.
Procedure:
The first thing I did to make the logo was find letters
to use as a model.
The first ones I found were these 8 cm high letters

With these letters I wrote what I wanted to say in my
logos,

but they seemed too big.
I placed these letters on a white sheet of copy paper and then took a picture of the words.
With the computer, I reduced their size to 3 cm high and made a template on another white sheet of copy paper.

Using different color 3mm wide and 10 cm long paper
strips I made plenty loose circles.

I placed these loose circles on my template and, one at a
time, I shaped these circles with the help of pins.
I put as many shapes and pins as needed to form each letter. If you scroll down I will have detailed pictures to show you how I did it.

I put as many shapes and pins as needed to form each letter. If you scroll down I will have detailed pictures to show you how I did it.
The
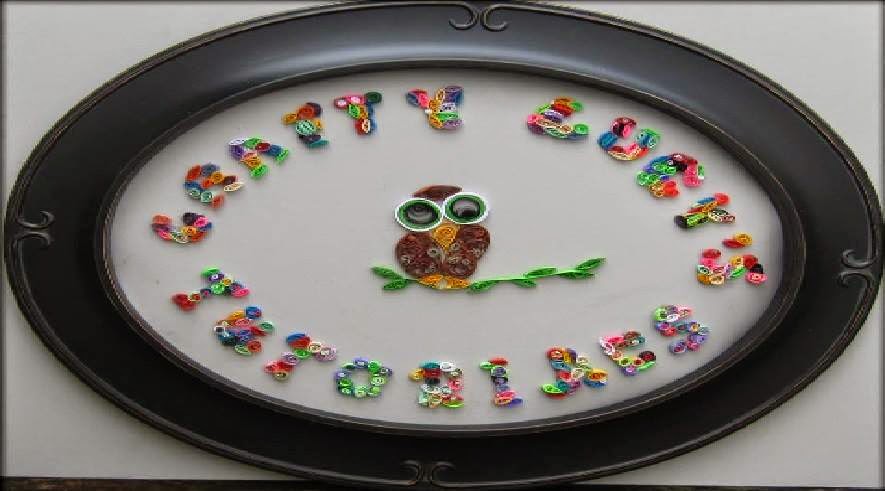
first line in my logo reads “Crafty Lucy’s”

After finishing the first line I decided to change the
typeface.
This time I used some wooden letters, also 3 cm high,
which I found in a store that sells craft materials.

With these letters I wrote the words to see how they looked,


After deciding that I liked it, once again I wrote the necessary words on a piece of copy paper, carefully tracing each letter on a regular sheet of copy paper.

After deciding that I liked it, once again I wrote the necessary words on a piece of copy paper, carefully tracing each letter on a regular sheet of copy paper.

Using the same method I used to write "Crafty Lucy's", I "wrote" the words “Tips, Quilling, and Tutorials.”


As I have 3 blogs, the final work took 367 circles and
429 straight pins.
Once I removed all the pins, this is how the words look like.


Once I removed all the pins, this is how the words look like.
All this work took me 7 days, working about 6 hours
each. The "writing" of the words took me 4 days.
Now I have to quill an owl for each blog and finish the logos.
Now I have to quill an owl for each blog and finish the logos.
♥°♥
¸¸.•´¨`»«´¨ •.¸¸♥.°♥
The method of using straight pins to help you shape
letters may be used in any project where you are tracing/filling shapes or areas on a
drawing.
♥°♥
¸¸.•´¨`»«´¨ •.¸¸♥.°♥
I hope that this tutorial was useful. I wish you a
happy quilling!
( ¯'v´¯) ★★★★
.`•.¸.•↓↓↓↓↓ ↓↓↓↓↓
Thank you for visiting me ☆☆☆☆
.`•.¸.•↓↓↓↓↓ ↓↓↓↓↓
Thank you for visiting me ☆☆☆☆
¸.•´.•´¨) ¸.•¨) ☆¸.• °*”˜˜”*° •.¸ Crafty Lucy ☆ ☆¸.• °*"˜˜"*° •.★★¸°*"˜˜"*° •.¸☆
(¸.•´(¸.•´ (¸.•¨¯`*
☆¸.•°°•.¸☆ ☆☆☆☆*° •.☆ *° •★★
♥´¯`*•.¸¸✿´¯`*•.¸¸✿ I hope to see you again ✿´¯`*•.¸¸✿¯`*•.¸